
Beacon Lighting Supply | Lighting the Way
If you are figuring out how to replace fluorescent troffers, the first decision is not wiring - it is whether you are replacing the entire fixture or retrofitting the housing you already have. That choice affects labor time, light quality, code compliance, ceiling fit, and long-term maintenance costs. For offices, schools, retail spaces, and common areas, getting it right up front saves a return trip later.
Fluorescent troffers are still common in 2x2 and 2x4 grid ceilings, but many of them are showing their age. Ballasts fail, lamps darken, lensing yellows, and energy performance falls short of current LED options. In some spaces, a simple lamp-and-ballast replacement still makes sense. In many others, replacing fluorescent troffers with LED is the cleaner long-term move.
How to replace fluorescent troffers the right way
There are two standard paths. The first is a full fixture replacement, where the fluorescent troffer comes out and a new LED troffer or LED flat panel goes in. The second is a retrofit, where you keep the existing housing but replace internal components with an LED kit. Both options work, but they serve different job conditions.
A full replacement is usually the better choice when the existing fixture body is damaged, rusted, poorly performing, or outdated in appearance. It also makes sense when you want a cleaner finished look, better optics, improved controls compatibility, or easier future maintenance. New LED troffers and flat panels are often faster to service over time because the electronics and optics were designed as a complete system.
A retrofit can be the practical answer when the housing is in good shape, the ceiling condition makes full replacement more disruptive, or the job calls for a lower upfront material cost. Retrofits are common in occupied buildings where minimizing ceiling disturbance matters. That said, retrofit quality varies. A good kit can perform very well, but a poor match can create uneven light, fit issues, or driver access problems.
Start with the existing ceiling and fixture details
Before ordering anything, confirm the basics on site. Measure the fixture. Most fluorescent troffers are 2x4, 2x2, or, less commonly, 1x4. Verify the ceiling type as well. A lay-in fixture for a standard T-grid ceiling is different from a fixture or kit intended for drywall, hard ceiling, or surface mount applications.
Next, check the branch circuit voltage. Many commercial spaces are 120-277V, but not all of them. If you are working in a mixed-use building, older property, or industrial area, do not assume. Confirming voltage before product selection prevents the most avoidable ordering mistake on troffer replacements.
You should also review the existing light level and room use. A breakroom, classroom, corridor, medical office, and open office area do not all need the same output or color temperature. Replacing a fluorescent troffer is a good time to correct underlighting, overlighting, glare issues, or mismatched color across a facility.
Choosing between an LED troffer and an LED flat panel
For many retrofit projects, buyers compare LED troffers and LED flat panels side by side. Both are common replacements for fluorescent troffers, but they do not look or perform exactly the same.
LED troffers are often the closest functional replacement. They are familiar in commercial settings, available in multiple lumen packages, and built for direct fit in grid ceilings. They work well when you want a straightforward one-for-one fixture change with dependable commercial performance.
LED flat panels offer a slimmer profile and a more modern appearance. In offices, schools, healthcare spaces, and reception areas, they are often selected for cleaner aesthetics and broad, even light distribution. The trade-off is that not every flat panel is equal in durability or driver quality, so procurement teams should pay attention to construction, warranty support, and controls compatibility rather than buying on appearance alone.
What to check before you remove the old fixture
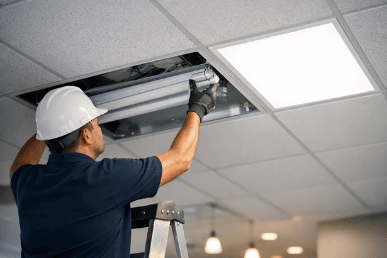
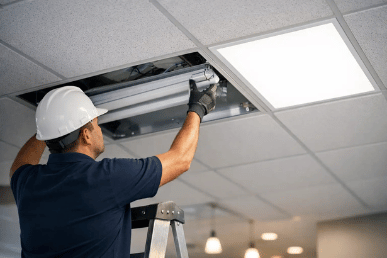
Shut off the power at the breaker and verify it is off with a tester. Then remove the lamps and access the ballast compartment. If you are doing a full replacement, inspect how the fixture is supported in the ceiling. In a suspended grid, you may have grid clips, support wires, or additional mounting hardware that must be addressed before the old troffer comes out.
This is also the point to inspect the branch wiring condition. Brittle insulation, undersized conductors, crowded junction areas, and improvised prior repairs are all signals to slow down and correct the installation properly. Troffer replacement is routine work, but routine work still needs clean electrical execution.
If the existing fixture is older, treat ballast removal carefully. Some older ballasts may require special handling depending on age and type. Local regulations and disposal requirements matter here.
Full fixture replacement process
When the plan is to replace the fluorescent troffer completely, remove the old fixture from the grid, disconnect branch wiring, and prepare the opening for the new unit. Confirm the new fixture matches the ceiling module and is approved for the installation environment.
Set the new LED troffer or flat panel into the ceiling grid and secure it per the manufacturer's requirements. Many commercial fixtures also require independent support wires in addition to resting in the grid. Make branch wiring connections in the fixture junction box, cap conductors properly, and route wiring neatly to avoid pinching or access problems.
Before closing up, confirm dimming leads or control wires if the fixture includes 0-10V dimming, occupancy integration, or emergency backup options. This is where many callbacks happen. A fixture may power on even when controls are not landed correctly, but the space will not function as specified.
Once power is restored, verify operation, light uniformity, and color consistency with adjacent fixtures. On larger projects, it is worth energizing a small test area first before the full installation proceeds.
Retrofit process for existing fluorescent housings
If you are keeping the housing, the basic path is to remove fluorescent lamps, remove or bypass the ballast as required by the retrofit kit, and install the new LED light engine and driver. Follow the kit instructions exactly. Retrofit products are not interchangeable just because they are all labeled for troffers.
The biggest advantage of a troffer retrofit is keeping the ceiling intact while modernizing performance. The biggest risk is assuming every existing housing is worth saving. If the reflector is bent, the door frame is loose, or the housing is contaminated or corroded, a full replacement is usually the better investment.
Pay close attention to how the retrofit kit mounts and where the driver sits. Service access matters. So does thermal management. A retrofit that technically fits, but crowded wiring or driver placement can create maintenance headaches later.
Light output, color temperature, and controls
A successful troffer replacement is not just about getting the fixture on. It is about matching the space. Lumen output should reflect ceiling height, room use, and fixture spacing. Too little light creates complaints. Too much light can be just as problematic, especially in office and education settings where glare and visual fatigue matter.
For color temperature, 3500K and 4000K are common in commercial interiors, while 5000K is more common in task-oriented or industrial environments. There is no universal best option. If the building already has a standard, staying consistent usually makes sense unless the project includes a broader lighting refresh.
Controls can also change the value of the upgrade. Adding dimming, occupancy sensing, daylight response, or emergency battery backup may raise fixture cost, but those options often improve code compliance and operating efficiency. On a multi-room or multi-building project, standardizing controls can simplify procurement and future maintenance.
Common mistakes that slow down troffer replacement jobs
The most common issues are simple: ordering the wrong size, overlooking voltage, forgetting control requirements, and choosing output based only on the old lamp count. A 3-lamp fluorescent troffer does not automatically convert to one specific LED lumen package. LED optics and efficiency change the comparison.
Another common problem is buying at the lowest price point without considering driver quality, warranty coverage, and consistency across a larger order. For facilities teams and contractors, this can lead to color mismatch, early failures, and extra labor that wipes out any apparent savings.
If the project includes multiple areas with different needs, break the schedule out by space type before purchasing. Corridors, offices, utility rooms, and conference rooms may all use troffers, but they should not always use the same specification.
When it makes sense to get product guidance
If you are replacing a handful of fluorescent troffers in one room, product selection is usually straightforward. If you are upgrading an office suite, school wing, healthcare area, or multi-site property, it is worth getting fixture recommendations before ordering. The right combination of size, output, color temperature, controls, and mounting accessories can reduce both install time and long-term maintenance.
Beacon Lighting Supply works with contractors, facilities teams, and procurement buyers who need that kind of project-ready support, especially when the job involves bulk quantities, mixed fixture types, or replacement planning across older buildings.
When you approach fluorescent troffer replacement as a lighting upgrade rather than a basic swap, the result is usually better light, fewer maintenance calls, and a cleaner path for future service.